Meandering Soul

This day is done, I'm going home.
eFranes Penguin Avatar

Grunt and Codeception

12
Dec 2014

Codeception is a great tool for testing PHP Applications in a variety of different ways. Grunt is a great tool for managing all kinds of deployment tasks from minifying CSS and JavaScript to moving compiled assets around. In terms of continuous integration and quick development cycles, I like to get the amount of commands I have to run to test any change in an application as close to zero as possible. Since this is not exactly a tutorial, I am going to assume that you know the basics of using the above tools, if not, I recommend you consult this Laracast for Codeception and Grunt’s very own getting started page on *drumroll* Grunt. And yes, I know that this Laracast is not free but trust me: Laracasts really are like Netflix for developers.

So far, I already had a Gruntfile and a Codeception configuration that reduced everything to:

1
2
$ grunt                   # run client side integration
$ vendor/bin/codecept run # run server side integration

This is not ideal though. Especially not for active development when I want this stuff to run after every relevant edit. Also, 2 is greater than 0. I figured that ideally, two things needed to happen:

  1. grunt starts codeception
  2. grunt tasks run automagically after file changes

The first requirement was easily achieved with grunt-run:

 1
 2
 3
 4
 5
 6
 7
 8
 9
10
run: {
// Gruntfile.js
...
    codeception: {
        cmd: 'vendor/bin/codecept',
        args: ['run'],
      }
    }
...
grunt.registerTask('default', ['run:codeception', ...]);

The second requirement can be solved using grunt-contrib-watch (Hint: I use Sass):

 1
 2
 3
 4
 5
 6
 7
 8
 9
10
11
12
13
14
15
16
17
18
19
20
21
22
// Gruntfile.js
...

watch: {
      js: {
        files: 'client/js/**/*.js',
        tasks: ['concat']
      },

      css: {
        files: 'client/sass/**/*.scss',
        tasks: ['sass', 'autoprefixer']
      },

      php: {
        files: [
          'app/**/*.php', 
          'tests/**/*.php'
        ],
        tasks: ['run:codeception']
      }
    },

Obviously, your watched directories might look a little bit different. This one here is for this website which currently is a strange hybrid between Laravel 4.2 and 5.

After these changes, for local development, I can just run grunt watch in a Terminal tab and leave that open, while on the CI server, I have the build script simply start grunt to have everything done for me.

Bonus: Desktop notifications

Desktop notifications are cool, right? I mean, at least when they actually contain useful information. Like for instance telling you that one of your tests failed. That would save you the time and effort to open up that grunt-watch terminal window after every change. So, the question is, can that be done?

While I did not stumble upon a perfect solution yet, I managed to at least get something that kind of tells me ‘Yay’ or ‘Nay’ with grunt-notify.

Setting up the notify plugin is ridiculously easy. The only thing I added in addition to enabling the plugin, is the option to extend the notification display duration and bam!, notifications appeared:

1
2
3
4
5
6
7
// Gruntfile.js
...
    notify_hooks: {
      options: {
        duration: 5
      }
    }
  • Published on December 12, 2014
  • 480 words

Tags

22
Nov 2014

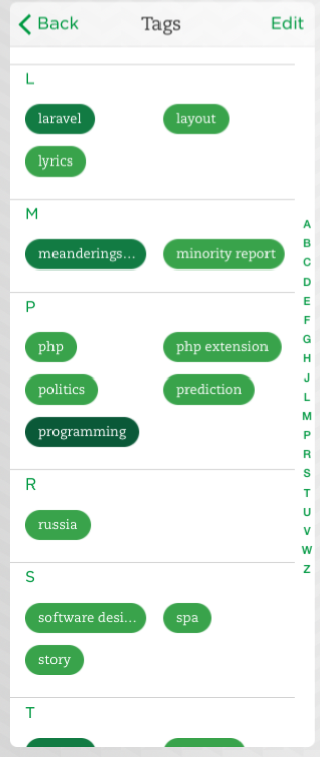
A long time ago, I wrote that tags are obsolete (translated version) because search engines are better than ever at figuring our content out. And I am still convinced of that. This is one of the reasons why this website does not even have the functionality for tagging things. I did not need it, thus I did not code it. Apart from this mere technical aspect, there’s also the human factor of tags being another layer of complexity. In redesigning this website - and still constantly thinking about improvements - I made an effort not to add features I don’t want. I deliberately chose to leave Wordpress behind once and for all for the single purpose of having complete control over what this website does when and why. Admittedly, there are still a lot of things that could be done differently and better but to that end I am currently waiting on the release of Laravel 5 in order to save myself some work of the “doing things twice” nature.

But - and this is a big one - in the meantime I realized that there are indeed applications where the presence and use of tags can be beneficial. For me, this insight came with my rediscovery of Evernote. For the uninitiated, Evernote is a multi-purpose note-taking tool of general awesomeness, but to go into more detail on that would probably be worth a separate article. I do read a lot of things on the internet. My basic workflow for that is somewhat inspired by this wonderful article about learning workflows: Finding things, saving them in Pocket and – if the content seems worth keeping around – moving it over to Evernote. When I started that, I did not ever do anything more than push the „Share to Evernote“ button. The first major change occured when I created a special notebook for all the things I share via Pocket (or clip directly from a website). This simplified things in the Evernote UI quite a bit since all the articles were no longer mingled up between my personal notes and blog post drafts and all that stuff. Later, at first just as a little experiment for myself I took to applying tags on the things I share to Evernote. The idea was to summarize what I just read in three to five keywords and use these as tags.

This is where something unexpected happened. After applying this technique for a few weeks now and increasingly finding myself looking at the Tags section of the interface instead of just bluntly searching. Oftentimes, when I’m working on some programming problem or in a discussion in some project, my subconscious tells me that I read something about that topic that could be of value. Before, I had to force myself to exactly remember what I read in order to find it. Now, I am able to just take a quick glance and find the keywords that correspond to the situation. Additionally, this sometimes leads to making new connections between things because it’s easier to connect words than whole articles.

I am thus taking my previous harsh statement back. Keywords/Tags are not completely obsolete. I still believe that they are mostly useless for things like search engine optimization or rather any machine-processed content. They can though play an important role in reclaiming an overview or diving deeper into collections for humans. I currently add 10-20 web shares to Evernote per month. This may not sound very much, but do this over a few months or years and the amount of things to remember that they exist quickly exceeds the amount of things we are able to have present because of all the other stuff life requires us to know on a day-to-day basis. Ever since I first read about the pensieve in the Harry Potter novels, I wanted to have one. I wanted to store the information and thoughts I did not need „right now“ somewhere where I could easily find them when I needed them. However, back in late 2009, when I first used Evernote (or at least that’s what my oldest notes are dated at), I did not see it’s power to be just that – my pensieve. Back then though, access to the internet was not as ubiquitous as it is nowadays. Therefore and because the kind of devices we used to carry around just wasn’t powerful enough yet, it simple wasn’t possible to carry around this kind of brain extension.

Evernote has already become part of my pensieve in the cloud and yet still I wonder what features I have not yet discovered, what haven’t I yet thought about maybe using in a different way. We live in a world where having a good storage system is more important then ever and yet I too often find myself struggling to retrieve the right piece of content in the right situation with as little effort as possible. But tagging things seems to help.

  • Published on November 22, 2014
  • 835 words

Automating vagrant boxes on OS X

06
Jul 2014

A while ago, I said I would be writing about how to automate Laravel Homestead (or any other Vagrant box for that matter). As it turns out, I did not have to reboot my system for a very long stretch of time which in turn meant that I did not feel the need to automate something I wasn’t even doing manually in the first place. But enough already with the non goal-oriented writing. I love to automate tedious everyday or not so everyday tasks in order to

  1. gain more time doing productive work and
  2. worry less about system management.

To tackle the actual problem at hand, I tried to find out what exactly I wanted to automate. There are many parts of a Vagrant setup that can be automated (essentially almost all of them) but once, a few hundred days ago, there was an excellent xkcd that I try to keep in mind whenever I set out to automate some part of my workflow.


Ideally for me, Homestead should…

  • autostart after booting
  • suspend when on battery power and no network signal is available
  • resume once the above holds no longer true
  • halt before a system power down.

The part where I don’t want it running with no network signal and the system on battery is a fail save compensating for my machine being rather old which translates to not having that gorgeous battery life of the newer generation MacBooks. Halting the box before a system power down is not strictly necessary since even if some part of the box gets corrupted Vagrant will just redeploy it and you won’t even notice. But redeploying consumes avoidable time and system resources.

Anyway, that’s a lot of requirements and looking back at the above xkcd, I decided that I would actually be very satisfied with just having my Homestead environment start automagically whenever I have to reboot the system for now.

Fortunately, OS X provides several great instruments for automating workflows. The most powerful one is certainly the system’s launch daemon launchd which is OS X’s replacement for both cron and init.d like programs which you might know from other Unixes or Linuxes. As with most Apple software, launchd reads configuration files in the so-called property list format which is essentially a barebones dictionary representation for XML that feels really really ugly for first-time viewers. (Don’t worry, it will continue to feel strange.)

If you are new to launchd, you might want to go checkout this a little dated but wonderful primer.

Launchd can do all kinds of things based on all kinds of conditions but the most practical one for me is automatically starting software I want to be running in the background. To start Homebrew’s Vagrant box is easily done with something like the following configuration.

 1
 2
 3
 4
 5
 6
 7
 8
 9
10
11
12
13
14
15
16
17
18
19
20
<?xml version="1.0" encoding="UTF-8" ?>
<!DOCTYPE plist PUBLIC "-//Apple//DTD PLIST 1.0//E" http://www.apple.com/DTDs/PropertyList-1.0.dtd">
<plist version="1.0">
  <dict>
    <key>Label</key>
    <string>com.meanderingsoul.homestead-up</string>
    <key>ProgramArguments</key>
    <array>
      <string>/usr/bin/vagrant</string>
      <string>up</string>
    </array>
    <key>WorkingDirectory</key>
    <string>/your/homestead/path</string>
    <key>KeepAlive</key>
    <dict>
      <key>SuccessfulExit</key>
      <false />
    </dict>
  </dict>
</plist>

Save the above at ~/Library/LaunchAgents/com.meanderingsoul.homestead-up but don’t forget to change ‘/your/homestead/path’ to the path to your Homestead configuration. Paths in launchd-configurations should always be absolute unless you specify the EnableGlobbing key. After saving the file, remember that these configurations must be executable, ergo chmod +x ~/Library/LaunchAgents/com.meanderingsoul.homestead-up. This will start Homestead after logging (e.g. rebooting the system.) Thankfully, vagrant will not up an environment if it is already running, thus a lot of security checks to avoid this can be omitted.

A note on starting for the first time

Just saving the Property List in the Launch Agents directory will not load it into the system. Eventhough it should be automatically loaded after the next reboot, you can do so manually with launchctl load ~/Library/LaunchAgents/com.meanderingsoul.homestead-up.plist. This will register the agent with the system. In order to directly run it, just type launchctl start com.meanderingsoul.homestead-up.

  • Published on July 06, 2014
  • 637 words

Setting up Laravel Homestead on OS X

20
May 2014

Laravel Homestead is a pre-configured Vagrant box along with some tooling to simplify administration of said box. For the uninitiated: Vagrant basically boils down to elegant tooling for virtual machines, radically reducing the effort needed to e.g. setup local testing environments like Homestead for Laravel.

Preconfiguration

To get Vagrant running, a virtual machine runner is required. I usually turn to Virtual Box for that. Thus, go ahead and grab the latest version from the downloads section now.

After having installed Virtual Box, your system is ready for Vagrant, the download page for which is here.

Actually setting up

Personally, I like to set up my test servers as projectname.dev, e.g. this website’s dev version is accessable as meanderingsoul.dev on my machine. As long as one is running the websites from OS X’s packaged Apache, everything is great and dandy but as soon as one leaves that comfort zone for something more elaborated like a vagrant box, things get a little bit messy. The above presented URL scheme requires binding a webserver to port 80 which is disallowed by operating systems for user processes. And one simply does not want to run stuff as root all the time. But there’s a fix for that, which I’ll explain in detail below. Right now, it’s time to fire up the terminal and get stuff configured.

1
2
3
4
# Add the homestead box to your vagrant repository
$ vagrant box add laravel/homestead
# Clone the Homestead configuration to a convenient place (you'll need it to start, stop and reconfigure the box)
$ git clone https://github.com/laravel/homestead.git Homestead

To configure Homestead, refer to the official documentation (linked above). What is important for setting up the environment to work with projectname.dev URLs is to adhere to the following URL scheme:

1
2
3
sites:
    - map: projectname.dev
      to: /home/vagrant/Code/ProjectName/public

The official documentation also advises you to add aliases for all mapped hosts into your /etc/hosts file. I usually go about that by typing

1
$ sudo echo "127.0.0.1 projectname.dev" >> /etc/hosts

to amend the added hostname to the list. This is not the most organized way to edit the hosts file and there are more elaborate options like nameservers if you need to manage lot’s of virtual hosts. But it should do for most cases.

At this point, you could just vagrant up the homestead box and access your projects via http://projectname.dev:8000. But nobody likes these port suffixes, right? So let’s get rid of them.

Enter Apache. OS X (even Mavericks) comes with a bundled version of the Apache Foundation’s httpd, much better known as the Apache Webserver or just Apache. Webservers, apart from serving content they have direct access to, are also usually capable of proxying requests to other hosts. This is especially handy in the current situation since the bundled apache runs as a system process and is therefore able to attach to port 80. What’s missing is a proxy configuration that transparently forwards every request to http://projectname.dev to http://projectname.dev:8000. Assuming that you did not mess with your systems’ Apache configuration before you can just paste the following into /etc/apache2/other/homestead.conf. If you messed with the config, you most certainly know how to unmess it such that this works.

1
2
3
4
5
6
<VirtualHost *:80>
    ProxyPreserveHost On
    ProxyRequests Off
    ProxyPass / http://localhost:8000/
    ProxyPassReverse / http://localhost:8000/
</VirtualHost>

Starting Apache is as simple as apachectl start. If everything went fine, you should see your Laravel site at http://projectname.dev in your browser. In a future post, I am going to explain how to automate the start-up process with launchd.

One more thing

Homestead’s machine name is homestead. If you’re using machine name based environment detection in Laravel you may want to add that hostname to the list of your local hostnames.

[Update] Yosemite

Sometimes, when updating to Yosemite, the system replaces Apache’s httpd.conf with it’s default version. You may thus need to include your homestead host config again. (Hint: This only applies to you if opening one of your .dev hosts results in the displayal of “It works!”)

  • Published on May 20, 2014
  • 668 words

Simplifying environment detection in Laravel

29
Apr 2014

Laravels environment detection is a pretty rock solid way of choosing a different configuration based on the current application environment. Currently, Laravel does this by looking up the machine’s hostname and checking into which environment it was sorted. The hash map for that is contained in bootstrap/start.php. Unfortunately, solely relying on the hostname can be a tedious job on two ends of the web app development spectrum.

On the one hand, if multiple people work on an app and want to use their local computer as a testing ground, all of their hostnames (or maybe some clever wildcards) may have to be added to the local environment.

On the other hand, when upscaling an app horizontally, a multitude of hosts running the code might be around. Adding all of their hostnames might cause an even bigger hassle since they might not even all be known at deploy time.

I’ve come up with “One ring to rule them all” kind of solution that reduces my environment selection array to the following:

1
2
3
4
$env = $app->detectEnvironment([
  // set LARAVEL_ENV = production on production systems
  $_SERVER['LARAVEL_ENV'] => [gethostname()]
]);

Now, all you have to do is export the LARAVEL_ENV variable to the user your app is executed with, which for local testing purposes can be as quick and easy as typing export LARAVEL_ENV='local' in your favorite shell.

Update

After some testing in the wild, I discovered a serious flaw with my above approach: It will fail horribly if the environment variable is not set. To fix this I went ahead and dropped in a basic catch-almost-all for local environments. If that one does not evaluate, Laravel will automagically choose the production environment.

1
2
3
4
5
6
7
8
9
if (isset($_SERVER['LARAVEL_ENV']))
{
  $env = $app->detectEnvironment([
    $_SERVER['LARAVEL_ENV'] => [gethostname()]
  ]);
} else
{
  $env = $app->detectEnvironment(['local' => ['*.local', 'local.*', 'localhost']]);
}
  • Published on April 29, 2014
  • 304 words

ImageMagick with WebP Support on Ubuntu

26
Apr 2014

I recently wrote about reinstalling ImageMagick on OS X to get WebP support. A little later I was facing the same problem on an Ubuntu machine. To fix it there is also mainly just a matter of reinstalling. How to do that was explained to me here. It basically boils down to:

1
2
3
4
5
6
7
8
9
cd /tmp
mkdir imagemagick
cd imagemagick
sudo apt-get build-dep imagemagick
sudo apt-get install libwebp-dev devscripts
apt-get source imagemagick
cd imagemagick-*
debuild -uc -us
sudo dpkg -i ../*magick*.deb

Unfortunately, this does not take into consideration that one might run apt-get upgrade at some point in the future again and that this upgrade operation might overwrite the just painfully compiled webp supporting ImageMagick package. Luckily, there is a simple fix for that. Apt allows packages to be blacklisted from future operations. The list of these is contained in /etc/apt/apt.conf.d/01autoremove.conf. In order to keep the compiled version of the package all one needs to do is to add imagemagick* in the Never-MarkAuto-Sections, e.g. something like:

 1
 2
 3
 4
 5
 6
 7
 8
 9
10
11
12
13
APT
{
...
 Never-MarkAuto-Sections
 {
    "metapackages";
    "restricted/metapackages";
    "universe/metapackages";
    "multiverse/metapackages";
    ...
    "imagemagick*";
 };
};
  • Published on April 26, 2014
  • 181 words

Java

24
Apr 2014

In Java, you can forget about doing it in the cleanest or the best way, because that is impossible. Whatever you do, however hard you try, the code will come out mediocre, verbose, redundant, and bloated, and the only thing you can do is relax and keep turning the crank until the necessary amount of code has come out of the spout. — Why I like Java

  • Published on April 24, 2014
  • 74 words

When reinstalling helps

22
Apr 2014

Today I learned about brew reinstall. This command allows to reinstall the currently installed version of a package. Now, why would that be useful? Because sometimes things go wrong. In my case, the installation of the latest PHP 5.6 release went wrong somewhere. Since I am generally bad at reading log messages, I did not notice that until I actually needed it working.

At first, it threw tons of errors at me of which I thought they originated from the code I was trying to execute - wrong. Then I realized that I might not have updated all the extensions I needed. Also wrong. Then I fooled around a bit and stumbled across homebrews reinstall command. It took a few cups of coffee for

1
brew reinstall php56

to finish but that’s okay. It magically worked again.

Literally only minutes later was it when I discovered that my imagemagick installation was not compiled with webp support. Having learned about reinstall I could solve that problem without a stack overflow marathon.

1
brew reinstall imagemagick --with-webp

Another cup of coffee.

  • Published on April 22, 2014
  • 181 words